
Learn about GVM upgrades for dual cab utes and SUVs with expert advice from Adrenalin Offroad Centre, ensuring safer towing, load handling and optimal vehicle performance.
Ever wondered what goes into a gross vehicle mass (GVM) upgrade of a modern dual cab ute or SUV? Put most simply it is a process of re-rating a vehicle so it can legally carry a larger load than standard. Even if you don’t tow a caravan many vehicles set up for long range touring are pushing GVM limits with the additional weight of the accessories mounted to the car. When you factor in the extra tow ball load a caravan contributes to the tow vehicle weight, there is very good chance your vehicle's GVM should be reviewed.
In this story, we chat with Jamie, store manager from Adrenalin Offroad Centre about the practical side of organising a GVM upgrade through a 4WD specialist shop. (If you want to learn more about the theory of GVM upgrades read this article.)
 Jamie and the team at Adrenalin Offroad Centre provide expert advice on GVM upgrades
We took a bunch of pictures during out time at Adrenalin Offroad so you can get an idea of the parts that get swapped out, but it is not intended to be a ‘how to’ article. The GVM approval process requires GVM kits to be fitted by an accredited installer. This is what we learnt from Jamie.
Understand the customers requirements
“The first thing we do with the customer is understand if a GVM upgrade is a good idea by determining what the weight of the vehicle will be when finally loaded. If the car is already on the road and set up how the customer wants it, the process is simpler in some ways. It’s important to remember the tow ball weight of the caravan becomes part of the vehicle payload and contributes to the GVM. Once we have a handle on the weight we can recommend the most suitable suspension configuration. If the vehicle is stock or not yet fully configured, we need to work with the customer to understand where the extra weight is likely to end up. We take into account accessories like bull bars, winches, underbody protection, long-range fuel tanks, canopies, rooftop tents, water tanks, drawers and of course tow ball downloadings. Fortunately, we fit all this stuff so we have a very good handle on how this will contribute to the total weight. If the weights are going to stay within the original factory GVM we may recommend not to proceed with a GVM upgrade. Instead, we can look at a suspension upgrade to improve the ride or ground clearance without re-rating the vehicle.
“We educate our towing customers that our GVM upgrades do not increase tow ratings or gross combination mass (GCM) . We also let customers know that if a vehicle is already registered it requires an approved automotive engineer to sign off on the vehicle in its entirety, not just the suspension kit we fit. This adds a few hundred dollars to the process provided the approved engineer doesn’t require any other changes. However, if a GVM upgrade is done before registration we do not need an engineer sign-off.
“If we determine that a GVM upgrade is the best option, we then figure out with the customer which preapproved GVM upgrade kit from our preferred supplier (Ironman 4x4) is the best option. It involves choosing the most appropriate spring ratings and shock absorber grades. As a general guide, for the front end of the car, we offer spring ratings based on whether there will be a bull bar fitted or not. At the rear, we factor in whether the loads vary or remain fairly constant. For example, having a van on or off can easily change the rear load by 300kg or more. If the vehicle is often not fully loaded, we aim for lighter springs that best suit how the vehicle will be driven most of the time. Choosing heavy springs for a car that only spends a small amount of its time doing heavy towing will result in harsh ride when the van is not hooked up. If the vehicle is constantly loaded, we look towards heavier, stronger springs.
“We also have to be mindful of how the loads impact on the front and rear axle load ratings. Again, heavy loads like caravans can make a big difference really bumping up the rear axle weight but also decreasing the front axle weight. As far as shocks go, we offer the choice of a mid-spec foam cell shock or a premium foam cell shock for heavy-duty applications. We also let the customer know that the GVM upgrade kit will raise the car around 20–50mm.
“As far as pricing goes, most of the dual cab ute GVM kits are about the same. A standard kit with mid-spec shock absorbers is about $4.5k if installed before registration. Even a higher-end kit with premium shocks installed after registration with engineering approval will set you back about $6k installed.
“The final step is to check whether the particular GVM upgrade requires higher load-rated wheels or tyres than the original factory equipment. Obviously, this will add some more cost, but most customers are comfortable with it as they often plan to switch wheels and tyres anyway.”
The GVM kit installation process
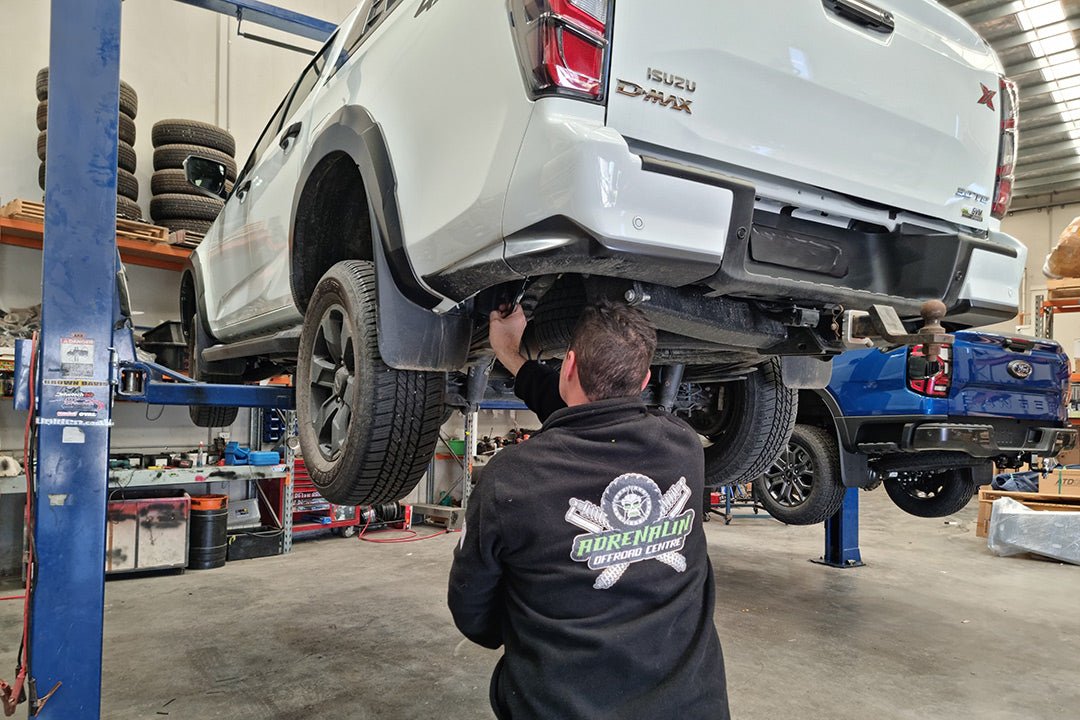
“We are working on an Isuzu D-MAX right now and it is typical of what we do on lots of utes. SUVs are pretty similar except they usually have rear coil springs instead of leaf springs.
“Our first step is to take ride height measurements of the car before we install the kit. This involves measuring from a nominated point on the rim to the top of the wheel arch. We repeat the exercise when the install is finished so we can see the lift is within suitable parameters.
“We take the ride height measurements for a few reasons. Customers are generally keen to know that they have got what they paid for, and we can demonstrate to them that the vehicle has improved body ground clearance. We also want to be sure that the vehicle doesn’t sit too high. There are legal limits on how much a car can be raised and we don’t want to go over that. Also, if the car is raised too high it can alter the suspension geometry to the point of driveline components operating on angles outside their design parameters which can cause premature wear or failure.
“Next, we get the vehicle up on a hoist and remove the standard front strut assemblies. In this instance the new front strut and spring need to be assembled together. You can see immediately the new ones are much beefier than the original equipment. Some struts have the ability to have the ride height adjusted during assembly, so we do that now. We use a jig to compress the spring to enable it to be assembled to the strut. For this upgrade, the customer also opted to replace the upper control arms (UCAs) to enable greater adjustability of the suspension geometry for more precise wheel alignments. So, it’s out with the old UCAs and in with the new. Then we can fit the new strut assembly to the car.
“Moving onto the rear, we unbolt the standard rear shock and remove it. Next, we remove the standard shackles, U-bolts and rear leaf springs. It’s grease time with the bushes and shackles receiving some lubrication. The new heavy-duty rear springs are lifted into place and secured to the chassis with the new shackles — they have grease points for ongoing maintenance. The new U-bolts are used to secure the new leaf springs to the rear axle. The U-bolts are longer to accommodate the extra thickness of the spring with more leaves than standard. Next, the new rear shocks are fitted. The final step in the fitting process is relocating the rear brake lines to allow for the increased travel of the car.
“Once the fitting process is finished, we take the vehicle for a brief test drive to check that everything sounds and feels right. After that, we measure the new lifted height and compare it to the original height. We then organise a front–end alignment to bring everything back in spec. The final physical step is to fit the vehicle with a new compliance plate indicating the new GVM rating of the vehicle.”
 STEP 1: The original suspension ride height is recorded STEP 1: The original suspension ride height is recorded |
 STEP 2: The standard front strut assemblies are removed STEP 2: The standard front strut assemblies are removed |
 STEP 3: These struts can have the ride height adjusted during assembly STEP 3: These struts can have the ride height adjusted during assembly |
 STEP 4: A jig is used to compress the spring to enable the strut to be fitted STEP 4: A jig is used to compress the spring to enable the strut to be fitted |
 STEP 5: The strut and spring are assembled in the jig STEP 5: The strut and spring are assembled in the jig |
 STEP 6: The standard upper control arms are removed STEP 6: The standard upper control arms are removed |
 STEP 7: The new upper control arms are fitted STEP 7: The new upper control arms are fitted |
 STEP 8: The new front strut assemblies are fitted STEP 8: The new front strut assemblies are fitted |
 STEP 9: The original rear shocks are removed STEP 9: The original rear shocks are removed |
 STEP 10: The original shackles are removed STEP 10: The original shackles are removed |
 STEP 11: The original U-bolts are removed STEP 11: The original U-bolts are removed |
 STEP 12: The original rear leaf springs are removed STEP 12: The original rear leaf springs are removed |
 STEP 13: The new bushes are greased and fitted into the upgraded rear springs STEP 13: The new bushes are greased and fitted into the upgraded rear springs |
 STEP 14: The new shackles are greased STEP 14: The new shackles are greased |
 STEP 15: The new rear springs are lifted into place STEP 15: The new rear springs are lifted into place |
 STEP 16: The new rear springs are secured to the chassis with the new shackles STEP 16: The new rear springs are secured to the chassis with the new shackles |
 STEP 17: The new rear springs are secured to the diff with new longer U-bolts STEP 17: The new rear springs are secured to the diff with new longer U-bolts |
 STEP 18: The new rear shocks are fitted STEP 18: The new rear shocks are fitted |
 STEP 19: The brake lines are repositioned STEP 19: The brake lines are repositioned |
 STEP 20: The upgraded suspension ride height is recorded and compared to the original STEP 20: The upgraded suspension ride height is recorded and compared to the original |
 STEP 21: A new VIN plate is fitted STEP 21: A new VIN plate is fitted |
 STEP 22: The vehicle is inspected after 500km STEP 22: The vehicle is inspected after 500km |
Administration and post-fitting check
“Usually, we get the suspension fitting process done in a day, but the administrative process can take a few days. We supply photos and measurements of the installation to the Ironman 4x4 head office. They review the information and approve if everything is in order. If it is a pre-registration GVM upgrade, Ironman 4x4 HQ log with a government department that the vehicle is now second-stage manufactured in the Register of Approved Vehicles. If the vehicle is post-registration, we need to make a time for an automotive engineer to inspect and approve the vehicle. The engineer provides a certificate that the customer has to take the vehicle to Vic Roads to have it officially registered with an upgraded GVM.
“We require customers to bring the car back after it has done 500km to retighten bolts and do a general checkover.”
Do you need a GVM upgrade?
A GVM upgrade may or may not be the best option for you but it is often a good way to get the most out of your vehicle and keep it legal and safe while towing. Choosing the right suspension option requires a fair degree of knowledge and experience. If you go with a GVM upgrade kit it needs to be fitted by accredited installers as part of the certification process. It pays to find a 4WD fitter you trust such as Adrenalin Offroad Centre to work through and implement the best solution for you.
THE NEXT STEP
If you want to learn the latest caravan news, find the most innovative new caravans and camping gear or get inspired to plan your next road trip off the beaten track and into the Australian outback, subscribe to our weekly newsletter. We promise to send you only the best content.
Related articles:
Factory 4500kg tow-rated Ford Ranger coming in 2026
A guide to tow vehicle GVM upgrades
Heading offroad? Get expert advice from Tough Dog 4WD Suspension


Understanding what goes into a GVM upgrade