
How To Replace A Roof Hatch
This hatch is on a motorhome, but the principle is the same for a caravan, the only difference being that here we’ve got a 1.2mm-thick sheetmetal roof and on a caravan it’s typically a 0.7mm-thick aluminium roof.
The hatch unit itself here is the type with an integral exhaust/inlet fan, but for the purposes of hatch replacement there’s no difference between this and a standard non-fan hatch except for the need to hook up two wires in this case.
This hatch had a couple of problems that caused it to allow water to leak through. The plastic frame had cracked in two spots and the foam seal used was intended to take up the gaps caused by the ribs in the roof panel but it actually worked as a membrane trapping water. Both problems eventually allowed water through, staining the ply panelling inside. Luckily it was caught fairly early, or the time-consuming (and expensive) job of replacing rotted interior ply would have been added to the job card.
Getting up on the roof of a caravan can end up in disaster, and that’s not just if you were to fall off.
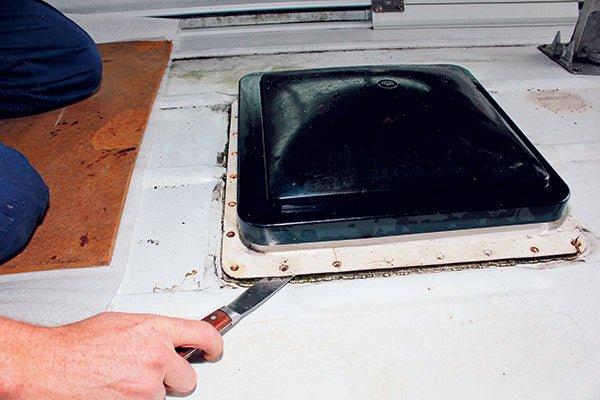
First the screws securing the hatch to the roof are removed. Then the hatch assembly can be prised away from the roof panel. This hatch was lifted off easily because the seal was so poor, but often they can be difficult to remove. Don’t use metal implements (screwdriver, scraper etc.) because they’ll damage the roof. Instead use a plastic chisel or a bevelled edge strip of perspex to break the seal and to gently prise the hatch off.
Then it’s time to clean up the old seal and/or silastic, first applying wax and grease remover to soften the remaining seal and then either a plastic scraper or a nylon brush drill attachment. A final wipe over with wax and grease remover and the roof is ready for the new hatch.
The hatch needs to be prepped, firstly by sanding the smooth plastic so it’s rough enough for the silastic to bond to it. The fascia covering the hatch surround on the ceiling will also probably need to be trimmed.
This conversion didn’t have any reinforcement bracing between the roof panel and the ceiling ply lining so to ensure that the new hatch remained watertight, timber bracing was added.
Now silastic can be added to the new hatch. We’ve used a non-acidic silastic to ensure that corrosion is kept at bay. The trap here is to not use enough silastic – the excess can be wiped off and if you use too little then it can come back to bite you with further water leaks.
The hatch is placed on the aperture on the roof and gently pushed down so that the silastic makes a good seal.
Then the roof can be secured with, in this case, stainless steel self-tapping screws. Stainless screws don’t rust and so again help to avoid corrosion.
Then the excess silastic is wiped off, first spraying a detergent/water mix so that the silastic excess is more easily removed and doesn’t stick to the surrounding roof panel.
Finally, the fascia is secured to the ceiling with self-tapping screws.


