Axe Maintenance 101

When was the last time you gave your axe some love? Be honest; it’s been strapped to the bonnet or roof racks of your tow-tug, or rattling around among your other tools, since you bought it. It’s probably blunt due to the many times you’ve used it, and in between uses it’s been subject to weather and has been rubbing against every other item in your toolbox. Or perhaps you picked it up from a garage sale or were gifted a spare from the back of granddad’s shed? Whatever the circumstances, the axe head’s edge probably looks more like a cross-section of the rugged Kokoda Track than a clean edged cutting tool.
A good axe should be respected. It can be just as useful to today’s outdoorsman (or woman) as it was for our pioneering forebearers. It’s easy to put an edge on an axe that’s suitable for clearing a track or chopping firewood, so we thought we’d take a look at how to keep your blade well maintained. This is not about sharpening your axe for competitive use. We’re interested here in giving you an all-round blade, good for common outdoor tasks, and strong enough to take a bit of abuse and keep cutting.
But, be warned. There are more views on how to sharpen an axe than most people have ‘friends’ on Facebook. So if you prefer a ‘Gucci solution’ instead of our back-to-basics approach, there are all sorts of sharpening tools out there that will take this routine task and turn it into an Olympic sport. Think Razor Sharp slotted paper wheels, Tormek water-cooled sharpening systems, Lansky sharpening systems or even the TSPROF sharpening system from Russia. Like most things in life, there’s no end to the amount of money you can spend, if you want to, on tasks that otherwise simply require a bit of elbow grease. As King Solomon is quoted as saying, “What has been will be again, what has been done will be done again; there is nothing new under the sun.”
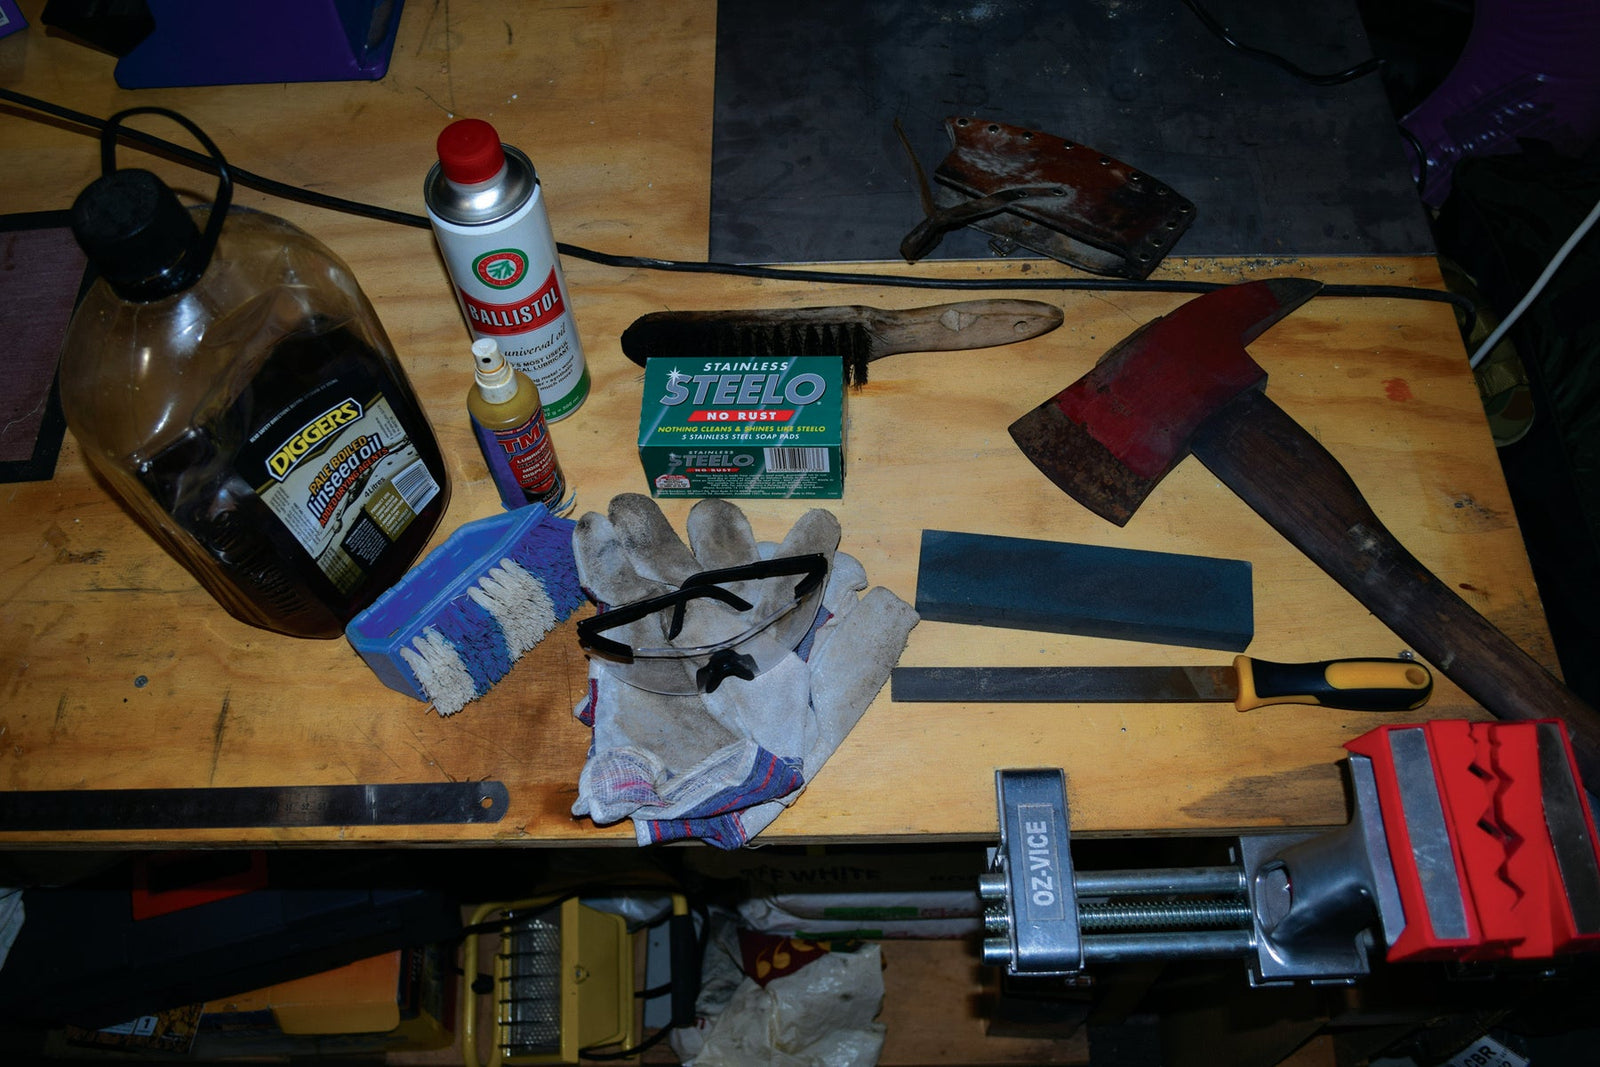
In terms of the profile of your blade and what it tells you about the axe, well, it’s ‘horses for courses’. The blade profile tells you the main purpose of the axe and how to sharpen it. If your blade is fat and convex, it’s for felling a tree or cutting wood. If it’s concave, it’s for splitting. A general duty axe (which is what a camper needs) will be slightly convex at the blade’s edge or bit and slightly concave on the cheek closer to the handle. The tools required to sharpen an axe like this are simple:
- A wire brush
- A bastard file
- A sharpening stone
- PPE (gloves and glasses)
Don’t use a grinder, as you may get the blade so hot that the temper (built-in hardness) of the steel is ruined. If you see the metal change colour, the temper has changed, and the blade won’t hold an edge. After this mistake, it might be better to relegate your axe to other duties. Perhaps use it as a croquet hammer!
STEP 1
Clean your axe with a wire brush to remove the rust. Then clamp it in a vice, edge facing upwards.
STEP 2
If the blade is in really bad shape, remove the burrs and nicks by holding your bastard file at the same angle as the blade-edge or bit. This will tend to be around 25-ish degrees for a splitter and 20 degrees for a tomahawk (note: we’re not looking here at the cheek of the axe itself).
So, if we settle on 22.5 degrees as the preferred angle, how do you know what this should look like? Grab a sheet of paper and fold the right angle in half. That will give you a 45-degree angle. Fold it in half again, and now you have an angle guide of 22.5 degrees.
Stroking in a downward motion, file each side of the blade, alternating sides and making three to five passes each time. Remove metal evenly until all chips and dings are filed away and the edge becomes smooth. Take care in doing so. With each stroke you’re progressively making the blade sharper, so a lapse of attention could give you a nasty cut or worse.
STEP 3
When the nicks are gone, the edge is ready to finish. Switch to a coarse sharpening stone, maintaining the same angle and stroke. If your blade is not too damaged in the first place, you can skip the bastard file and jump straight to the coarse stone.
STEP 4
Finish by using a medium/fine stone. But use a different stroke, this time circular in motion, adding a little fine machine oil as you go. Continue until both sides of your edge are polished to perfection. Test the edge by checking if it will cut a piece of paper. This is a safer option than showing off by shaving the hair off your arm. Respect the axe and yourself.
After all this you’re finished, right? Wrong. Just because the axe now cuts wood instead of bludgeoning its way through timber, you’ve done nothing to increase or sustain its life.
STEP 5
The dirt, sap, and general detritus on your axe head will induce rust. This will dull your blade and, let’s face it, it will look like dog vomit. The best way to remove this is with fine steel wool. Next, we have to protect the new surface. Good fine oils used on firearms are great for this. We like Ballistol or Seal-Lock TMT which is a lubricant and penetrant designed for NASA!
STEP 6
Give the axe handle a good rubbing over with the same steel wool you used earlier. This will make it smooth and remove any splinters. Then rub in some boiled linseed oil. Don’t use plain linseed oil as it will remain sticky and won’t dry for ages. Today boiled linseed oil isn’t actually boiled like ‘back in the day’, but instead is treated with a drying chemical, so use gloves for this part. Let the oil soak in for a little while then rub off the excess with a cloth.
STEP 7
If you don’t yet have a leather cover for the blade/bit, you should get one. It’ll save you having to sharpen as often. That said, the cover itself may also need some attention, so grab a stiff brush and give it the once over. Then get some leather oil, dubbin or beeswax and rub it in with a soft cloth. Don’t forget that the inside of the cover comes in contact with the axe head all the time, so put a little dubbin on the inside too.
In today’s throwaway society, simple tasks like maintaining an axe may seem like a chore. But taking pride in your tools, and demonstrating to yourself and your kids that something ‘ugly’ can come up trumps, is a worthwhile lesson in stewardship — all the more so if the tool that you’re working with was once owned by someone like your granddad. There’s a little bit of him in it, and he’d be pleased to see you in the workshop, file in hand, much like he used to.
Now you’re finished with the axe, isn’t it time to find the old shovel strapped to the roof racks and get the kids or grandkids involved in tidying that up? And while you’re at it, why not give your work boots, pocket knife scabbard and leather belt some love?


