
Tow vehicle upgrades: Part 1
Us humans are a funny bunch. Not in the Seinfeld jokes about aeroplane food kind of way, but more in the way we insist on customising everything we get our hands on. We change our phone’s wallpaper image, we paint our houses, and we rearrange kitchen drawers.
So it makes sense when you plan on hitting the road, that you roll out the spanners and make your adventure machine something that’ll be not only more suitable for your needs, but more comfortable on long trips away, too.
We’ve put together a list of must-have modifications, gleaned from years on sealed and unsealed roads lugging everything from top-dollar caravans to campers you wouldn’t lend your worst enemy. We’ve included a whole bunch of helpful info like expected costs and job difficulty so you can assess what gets done in your driveway, and what gets done at the mechanic’s workshop.
RATED REAR SUSPENSION
This is a no-brainer for seasoned towing veterans but, to a lot of newcomers, the idea of replacing half your suspension might seem a little odd.
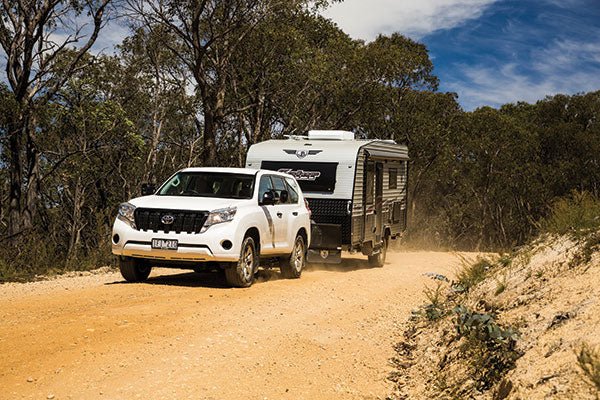
Whenever you hitch anything to your towball, from an empty box trailer to a six-berth caravan, a percentage of the trailer’s total weight goes onto the rear suspension of the tow-tug. The longer the distance between the towball and the rear axle, the more pronounced the effect. With a lightweight trailer, the ball weight is normally less than 100kg so easily falls within the expected payload of the stock vehicle. But a caravan can easily put down 200-plus kilos, which can quickly sag the rear suspension, pointing the headlights skyward and reducing braking and steering ability across the front axle.
Depending on the age of your tow-tug, the front suspension and even rear shocks can all be in fighting fit condition making the rear springs the only thing needing attention. Rear coil springs can be swapped easily once the vehicle is adequately secured on stands, although leaf-springs are considerably heavier and can be far more difficult to install, especially solo.
Expected cost: $200-$600
12V WINCH
This might be my 4WD background shining through, but the number one most important thing on my mind whenever I go exploring beyond the reach of mobile phone towers is an escape plan. If you’re rarely leaving the blacktop, a subscription to your local NRMA or RACQ equivalent is plenty. But if there’s even a slim chance of finding yourself in a predicament with no lifeline, an electric winch can be worth its weight in gold and, believe me, they weigh a lot!
I’ve often been known to call an electric winch ‘the hand of God’ because, with a little know-how, that’s exactly what they are. They’ll do the basic recovery if you find yourself in muddy terrain, but the real boon is being able to combine a winch with a few pulley blocks and extension straps and perform all sorts of miracles. From pulling loaded vans away from steep edges, to moving downed trees from the path ahead, and even helping out fellow travellers you might find on your way.
The actual install process is pretty straightforward. Four high-tensile bolts hold the winch into place with a control box feeding cables from the battery down to the winch’s motor. If your tow tug doesn’t have a bullbar or you don’t want one, many offroad shops can fit a hidden winch behind your stock bumper.
Better to have it and not need it than need it and not have it, I always say!
Expected cost: $600-$1500
REVERSING CAMERA
Over the years, I’ve punted more cars than I could remember in more places than I’ll ever admit to in a court of law. So, believe me when I say, reversing cameras make towing easier. Being able to effortlessly guide yourself back directly below the waiting hitch without three fights and a divorce threat in between is worth every cent.
Many tow-tugs come with reversing cameras as standard, but there’s still room for improvement. Duck down to your local auto parts store and pick yourself up a wireless reversing camera. They’ll come with a battery-powered camera and a plug-in small screen to mount inside. Walk right past the back of your tow-tug and hot-glue that camera firmly on the back of your van. It’ll allow you to easily reverse to within a few inches of obstacles, aid in guiding you into the perfect site for a week of relaxing, and is a final line of defence to make sure no wayward kids have plonked their bikes behind your van. Wired and wireless units are available with the wireless unit being a simple plug and play install. Keep an eye out for secure mounting points that show the back of the van without requiring you to puncture the outer skin. Read the back of the box, too, to ensure the wireless signal is strong enough to reach from van to tow-tug reliably.
Expected cost: $100-$500
TRANSMISSION COOLER
Modern automatics are far superior for towing than their manual counterparts. They’re easier to drive, shift smoother, provide torque multiplication to help get off the line and offer far more precise control. But they’re not without their downfalls. Due to their designs, heat will always be an issue. The factory will often include a small transmission cooler inside the engine’s radiator to help get the transmission up to speed but, as the engine and radiator heat up, the transmission begins to struggle to cool itself. In a standard situation it’s not a problem, but lug 3000kg worth of caravan on a summer day, and you best believe that transmission will be feeling every degree on the needle.
Fitting an additional transmission cooler can help mitigate the extra heat caused by hauling heavy loads. The benefits are longer life out of your automatic transmission fluid, and less chance you’ll be parked up on the side of the road while your dash beeps at you incessantly. In older vehicles, it was a simple process of replacing the soft lines between the transmission and radiator and routing them through a transmission cooler on the way. Modern vehicles can have completely hard-lined systems which will complicate things.
Speak to a local automatic shop about your tow-tug to see what’s involved and if bolt-in DIY kits are available.
Expected cost: $150+
MODERN BRAKE CONTROLLER
The ability to independently control a van’s braking system is one of the most useful and, frankly, lifesaving tools you can have in your arsenal; but not all brake controllers are created equal. Over the years, there’s been plenty of makes and models offered all with their own bells and whistles, but there’s now better versions available. Modern brake controllers are not only physically smaller, freeing up valuable in-car space, they’re also a heck of a lot smarter. Many offerings will feature user controlled modes for slow-moving in tricky situations, as well as an inertia sensing mode that’ll allow you to set and forget when doing long jaunts on the highways between stops. Having the brake controller sense how hard you’re braking and eliciting a similar response from the van, can save you vital braking distance in an emergency and mean you’ll never be fumbling for a poorly placed slider when an L plater pulls out in front of you.
There’s plenty of plug and play kits available on the market but most will require at least a semblance of electrical knowledge. They’re usually as simple as soldering a couple of wires and zip-tying up a wiring loom so it can be knocked over in an hour or so.
Expected cost: $300-$500
The full feature appeared in Caravan World #567. Subscribe today for the latest caravan reviews and news every month!


