
How to Install an Annexe
MANY OF US have discovered the joys of spring-loaded awnings, but what about the humble annexe? It’s true: we all like a little extra room, but memories of wet canvas in holidays past can leave a bad taste in your mouth. Spring-loaded awnings, however, have taken the aggravation out of installing annexes. The Australiawide Annexes team shows us how, using the new Caption Cook range of annexes and annex walls.
STEP BY STEP
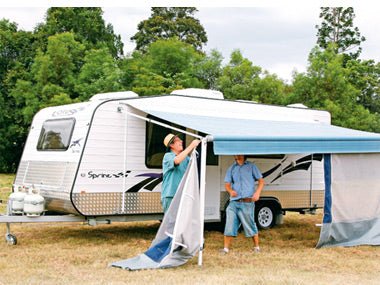
01 Fully wind out the awning and unclip the arms from the lower side of the van so they support the awning. A particular point to note is that the roller is in the six o’clock position, i.e., facing down. The annex wall(s) can now be fitted into the slot on the roller, but it’s a job easier done by two people.
02 Here’s a step that many people miss. Once the long wall is in position, the roller must be turned back towards the van 45°. This is done so that there is no gutter for gathering rainwater.
03 An anti-flap kit (AFK) is required to erect the annex walls. It keeps the awning tensioned and provides support for the front and rear walls. The awning sits in the AFK and is then held in position by two long clamps. Here, you can see how the lower clamp has been set by the cam levers, but the upper clamp still has to be clamped over. A little tip here is that the AFK comes in two halves and it is easier to put the two halves together before attaching the AFK to the side of the van.
04 Once the AFK has been attached to the van, the other end is hooked onto the roller.
05 The end walls can now be fitted into the rope track of the AFK. This is best done by starting from the middle and working to either side.
06 Here’s the result, showing how the AFK holds both the awning and the annex end wall.
07 To attach the walls to the RV, ‘returns’ are needed. These are slotted into a rope track on the side of the van and attached to the gusset in the case of a pop-top. Returns have a velcro strip, which makes it very easy to attach the side walls to the van.
08 The result is a wall that is securely held to both awning and RV wall.
09 An essential part of the annexe installation is the draftstrip, secured to the RV’s wall with press studs.
10 With the annexe pegged out and the floor laid, the awning is ready for use.
Source: Caravan World Feb 2009.


