
DIY Jockey Wheel Inspection
BECAUSE OF THEIR placement, jockey wheels are subject to a great deal of dust and road grime. Foreign particles find their way into the mechanisms of the jockey wheel and in particular cause corrosion and pitting of the ball race and its cup washers – components that take the load when you wind up the front of the caravan. This wear results in a grinding, rough feel as you turn the handle.
By replacing the worn or pitted ball race, the jockey wheel can be made to feel like new again. You might also consider a way to keep moisture out of the mechanism if the device is left outdoors for prolonged periods.
STEP BY STEP (see photo gallery)
01 Unclamp the jockey wheel and remove it.
02 Secure the jockey wheel in a vice.
03 Use a parallel punch (or a thick nail with the point removed) to tap out the dowel spring pin. The punch must be a near fit for the hole in the handle.
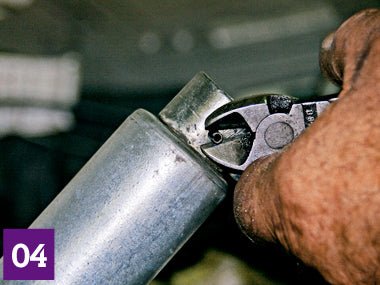
04 Once an end of the dowel pin is protruding, it may be possible to grasp it with pliers to extract it.
05 The jockey wheel’s core can be removed from the outer shell once the handle is detached.
06 At the top end of the core assembly is a series of washers and a ball race. Take particular note of the order in which they sit on the shaft before removing them from the core assembly.
07 Obtain a new upper bearing set to replace the worn and gritty set. Apply a liberal amount of grease to the new bearing set and assemble it on the shaft. Follow the above steps in reverse to reassemble the jockey wheel.
08 To extend the life of the bearing if the rig is left outside in the weather, slot a can and place it over the jockey wheel to stop water entry.
Source: Caravan World Aug 2010


